Hardware
- Main battery. This battery has an adaptor (Kokam) that is plugged to the electric plug on one side and the battery plug on the other side. Connect it to the only free plug that is on the back of the robot (the one that says CHARGE), and then turn on the adaptor. Wait for 5 seconds while some lights blink. After that, if a red light is continuously on, the battery is charging. If a light is green, the battery is charged. Important: Do not leave the adaptor on after the battery is charged, because it will not charge anymore. Leave the adaptor off for a while and then turn it back on. (This is a temporary solution until the Docking Station is complete).
- Segway RMP 50. To charge the battery, plug the cable to the electric plug on one side and the three hole plug to the Segway. There are two lights next to the plug, the important one is the rightmost one. If the plug on the segway side is connected properly and the battery is charging, the red light should turn on. If the battery is charged, the light turns off during 5 minutes. If the light is red, means that is still charging. If you hear a beep every second, the battery is low and you have to plug it for charging, otherwise at some point it will beep almost continuously and will shut down.
The segway charging cable is also temporary, until the Docking Station is complete.
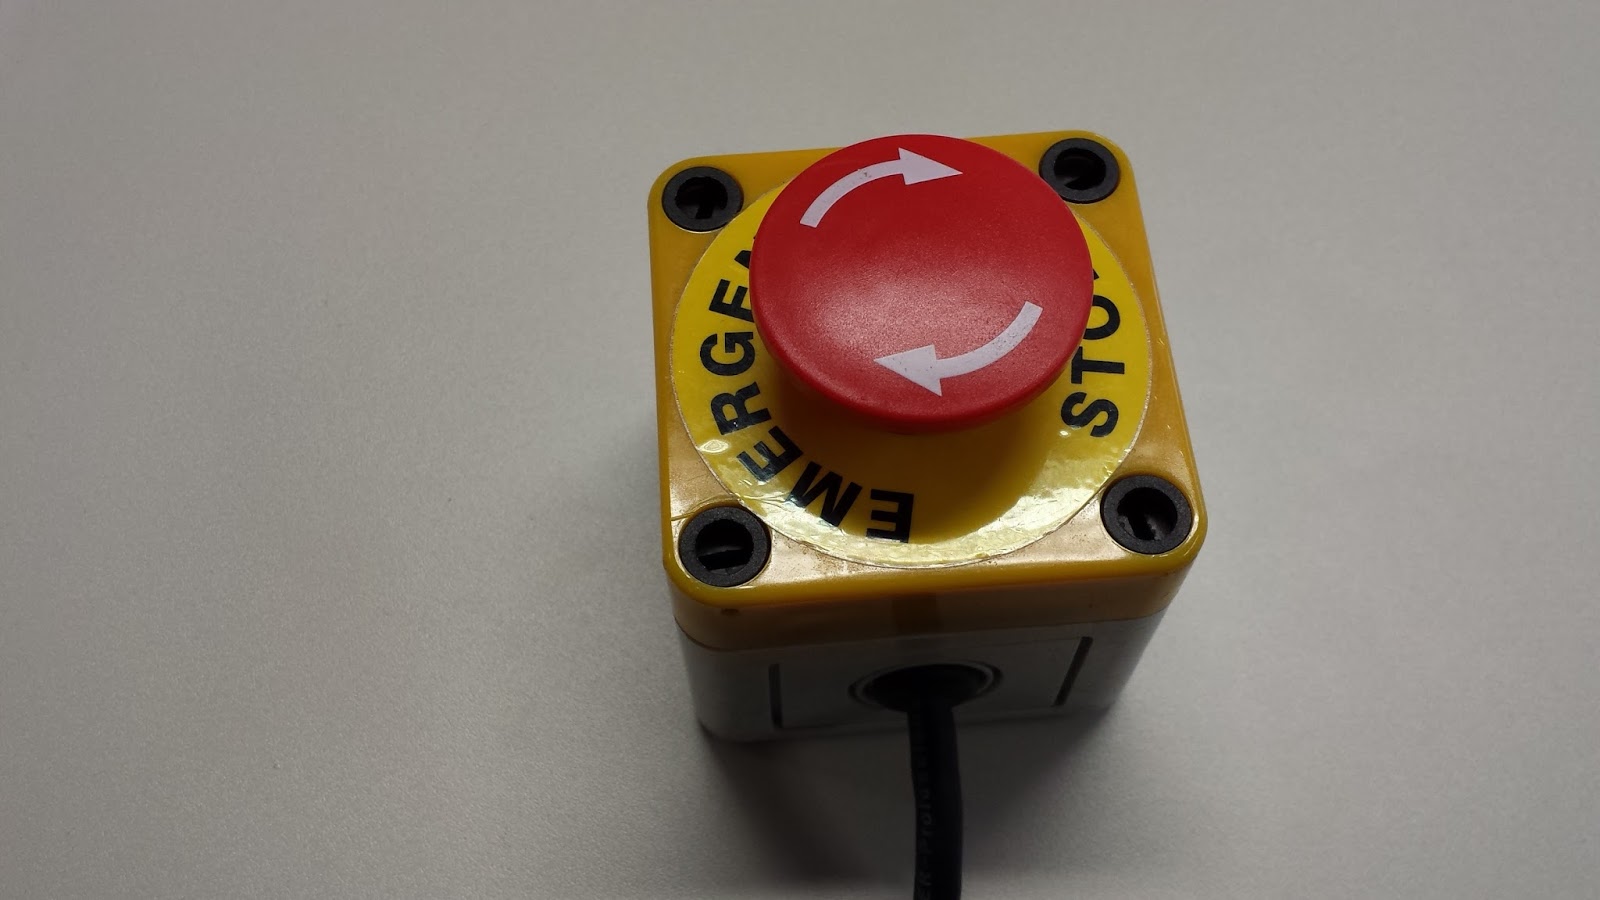
- Control/Power Boards and motors. There is an emergency button (See picture below) that switches off the power to the motors and control boards. It is a red button in a yellow box. Push the button to interrupt the power supply. To resume the power supply, turn the button until is lifted up a little. This button does NOT stop the segway! The segway has a separate power cord that you can pull to stop it during an emergency.
Warning: Unplug the Kokam (the one that says CHARGE) and Segway charging cables if you want to navigate around with the robot!!!
-
Battery to power source. There is one cable that connects the battery to the power source (saying LOAD). The cable is divided in two and connected by a plug similar to the main battery charging.
This plug is usually connected, so most of time you should not need to touch it.Since we are fixing an issue with the power relay, this cable should be unplugged after Vizzy is shutdown. In case the main battery is totally uncharged, unplug that connector and plug the adaptor directly to the battery during 5 minutes.
- CAN communication board to control boards and power boards. This communication board has two important lights: One on the connection side, where there are four gray cables connected. This orange light turns on when the pc turns on and indicates that everything booted up properly. The second light is located in the middle of the board, between the board and the hard disk. If that light is blinking and the motors are off, it means that there should be a problem with the communication. In this case run the canLoader (which will be explained in the troubleshooting section).
- Processor : Intel(R) Core(TM) i9-9900K CPU @ 3.60GHz
- Memory:
- Motherboard : ROG Strix Z390-i
- Graphics Card: GeForce GTX 1060 Ti
- Front Laser Scanner: Hokuyo UTM-30LX
- Rear Laser Scanner: Hokuyo URH-04LX
- Left Eye Camera: IDS UI-3881LE USB 3.1 3088 x 2076 @ 25FPS
- Right Eye Camera: IDS UI-3881LE USB 3.1 3088 x 2076 @ 25FPS
NOTE: The camera driver seems unable to launch both cameras at the same time. So, the solution to make sure both are initialized is to disconnect as reconnect the USB cable of the cameras before launching a demo.
There is a display attached to the batteries that show the current voltage value of each one of the cells.
- Fully charged, every cell should display 4.1
- Low battery, one or more cells display 3.6
The recommended minimum value is 3.6V for one of the cells
The current voltage of the battery is available on the topic /segway_rmp_node/segway_status, in the field ui_battery
- Charger Connected, ui_battery: 9.11250019073
- First low load beep, ui_battery: 5.73750019073
- Fully Charged , ui_battery: 6.40000009537