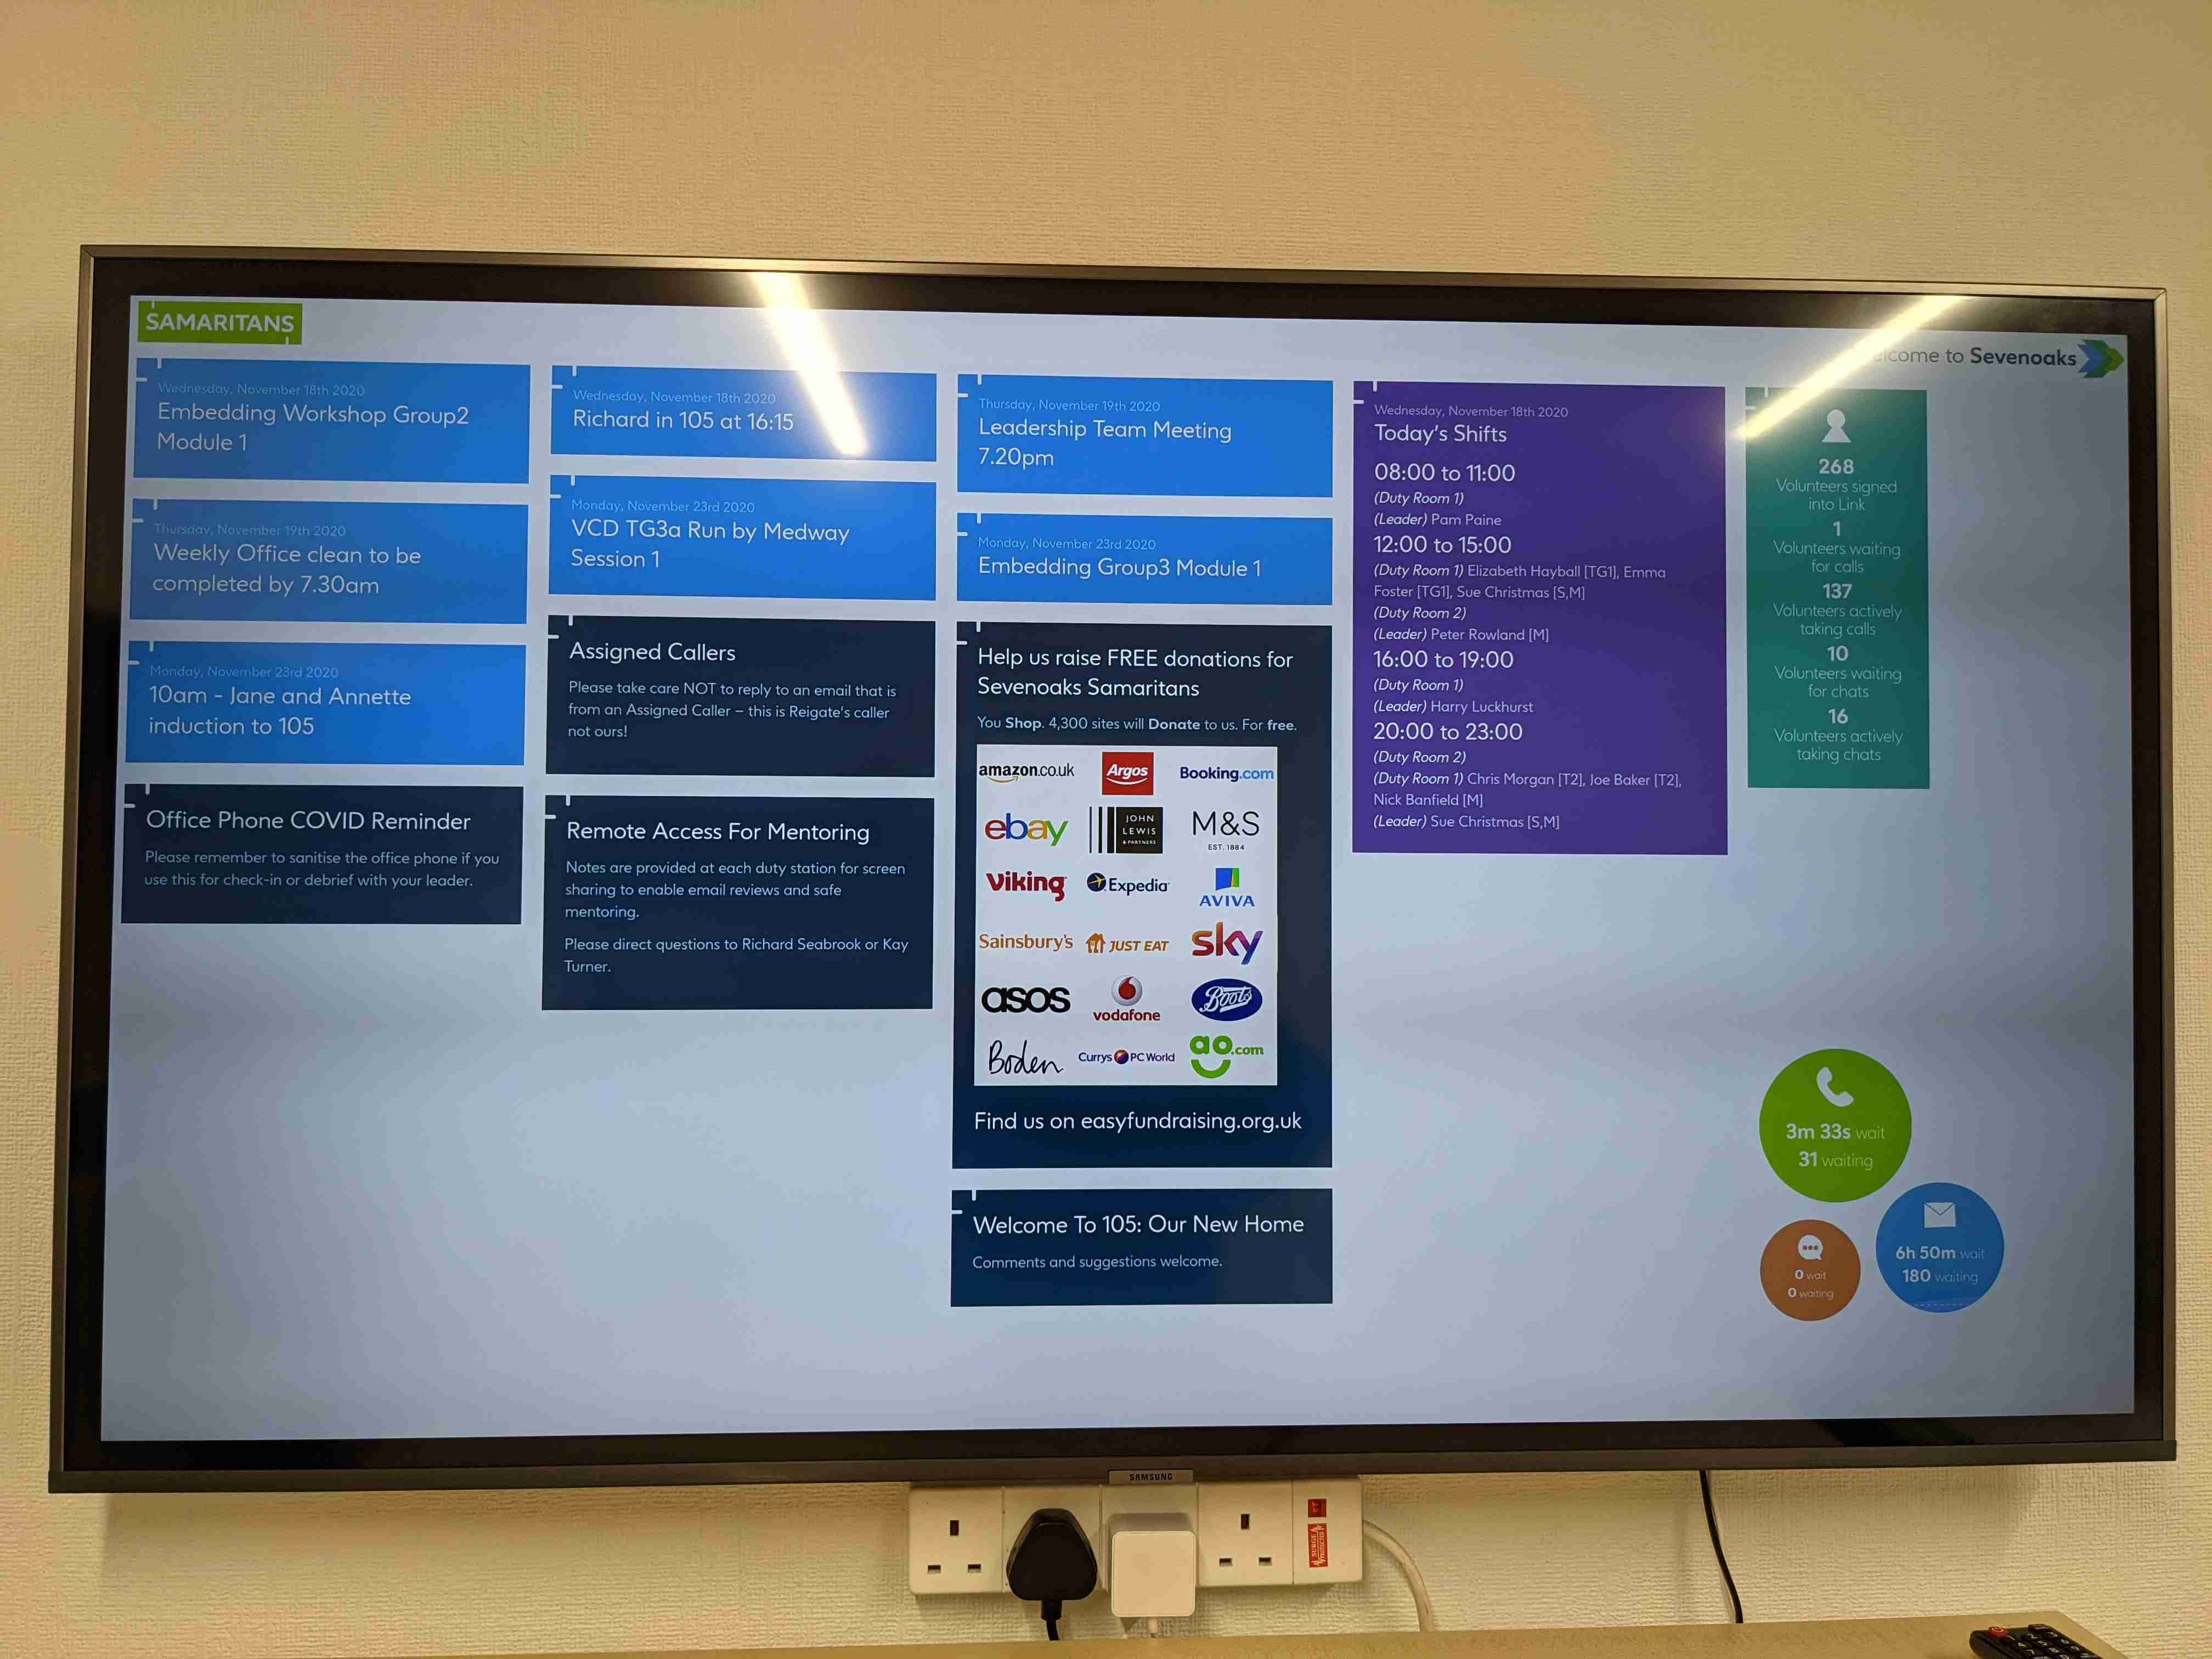
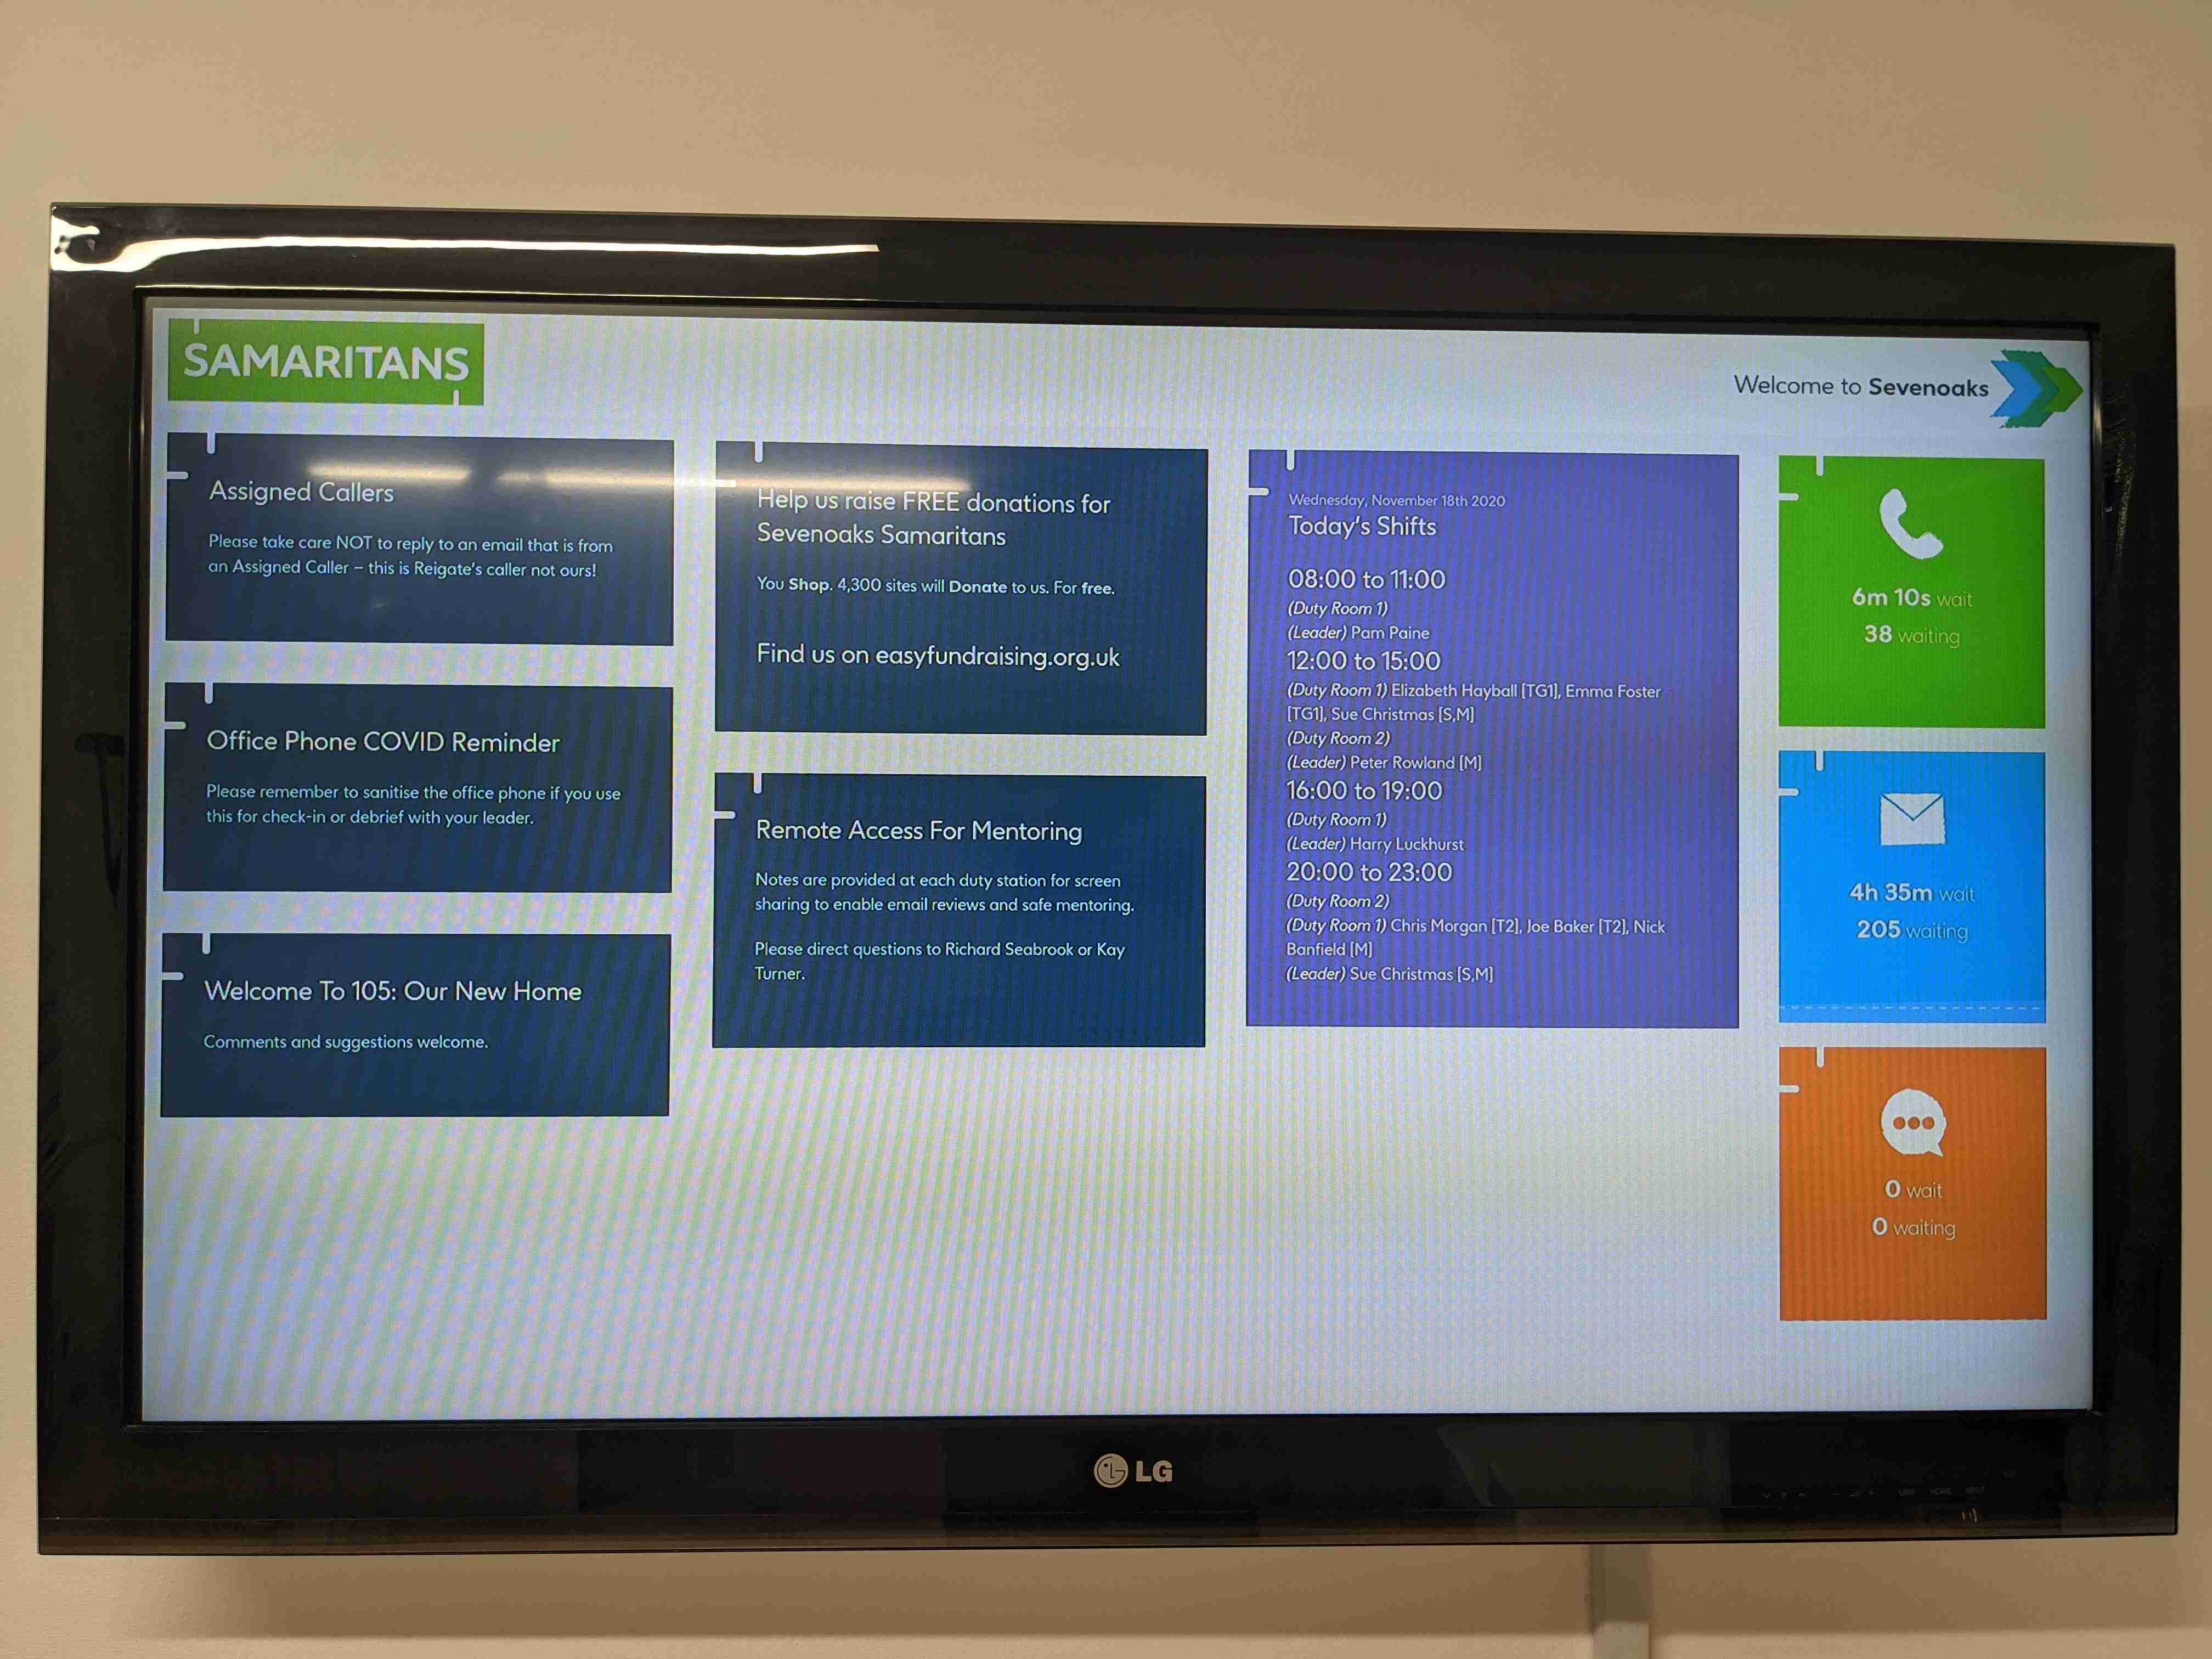
A status dashboard for Samaritans branches utilising Three Rings. It allows authorised users to post messages for others (via the 3R wiki), shows today's shifts, events for the coming week and status of inbound communications channels. It can be easily customised with a basic understanding of HTML, CSS and Javascript.
Predominantly designed for use on large screen TVs, there are two display modes which are selected automatically based on the screen size. It is strongly recommended to be utilised on 4K TVs for the additional screen real-estate:
This was written for Sevenoaks Samaritans, but is now utilised in a number of branches.
This code was written to be utilised on the low-cost and low-energy Raspberry Pi 4B, via balenaCloud which allows easy remote management and is free for our use case. This repo contains configuration to run an nginx Docker container and a Vue.js webapp which handles the screen presentation itself. It also uses the UIkit CSS framework.
The nginx instance serves the webapp, as well as acting as a CORS proxy to the SCO dashboard for queue statistics.
In our branch, we used:
1 x 4k TV (donated)
1 x 1080p Monitor (donated)
3 x Raspberry Pi 4 Model B - 2GB
3 x 'NOOBS' Preinstalled Micro SD Card (Latest v3.4.0) - 16GB
3 x Official UK Raspberry Pi 4 Power Supply (5.1V 3A) - White
2 x Official Raspberry Pi 4 Micro-HDMI Cable - 1M / White
- There is one more Raspberry Pi than the number of screens.
- Use a good quality metal case, so that heat can be dissipated adequately.
- Create a new Wiki in 3R called 'Branch Comms Screens' any pages you create in here will become on-screen messages. You may want to use 3R permissions to restrict the ability to change these and/or use the lock functionality.
- Create a new role in 3R called 'Branch Comms Screens'.
- Grant this role View on Events, under Directory Access grant View for all core roles, tick Directory Self-manage, View for Wiki and View for Stats and enable it as a Core role.
- Create a volunteer called 'Branch Comms Screens' with only this role, log in as this new account and add an API key for them via their Directory page.
- For each rota you want the screen to display, ensure Branch Comms Screens has View permissions over it.
- For the most part, we ensure that no other role can view or manage the Branch Comms Screens role, so that it does not appear in the Directory or risk being deleted.
- Sign up for a balenaCloud account, which is free for up to 10 devices.
- Create a new application called 'nginx', set the default device type to match your Raspberry Pi model and leave the application type as 'Starter'.
- Go to the Environment Variables tab and add a variable called THREERINGS_APIKEY with the value of the API key created in 3R.
- Go to Releases tab and add a release. Follow the instructions and upload the contents of this repo.
- Add a device leaving all settings at defaults, except selecting 'Wifi + Ethernet' and entering your wifi network details if required. Download the resulting disk image and burn it to your Micro SD card using Etcher.
- Boot the Pi and note the IP address. You will probably want to set your branch's DHCP server to allocate a specific IP to this device with a static lease. You can find the device's MAC address once it is online in the Devices tab and then clicking on the device itself. This page also shows you any log messages and allows you to remotely reboot, etc.
- Visit balena-dash and click the 'Deploy with balena' button.
- Select to create a new application and name it 'balena-dash'.
- Go to the Environment Variables tab and edit the variable called LAUNCH_URL. Set it to http://YOUR.IP.ADDRESS.HERE/ substituting the IP your nginx Pi is running on.
- Add a device leaving all settings at defaults, except selecting 'Wifi + Ethernet' and entering your wifi network details if required. Download the resulting disk image and burn it to your Micro SD card using Etcher.
- Burn the same image for any additional screens.
- Connect the Pis to the screens and boot them up. You will probably notice the screen is oddly placed, we'll fix that next.
- Go to Devices tab and click into each device in turn, under Terminal select a target of 'kiosk' and start the terminal session.
- At the prompt, run 'tvservice -s' and note the detected screen resolution - eg 3840x2160.
- Go to Device Variables and edit the WINDOW_SIZE variable, setting it based on the value found above but exchanging the x for a comma - eg 3840,2160.
- Reboot the device - you can do this from the device summary page.
You will probably want to change our branch name at a minimum. This is found in this repo at html/index.html along with the majority of other items you may want to alter.
To change the breakpoint between the two screen modes change any reference to 3800px to a new value. Also change 3799px to a value one lower than your new setting.
To allow easy testing of the two resolution modes, you can use the files at http://YOUR.IP.ADDRESS.HERE/test_1080p.html and http://YOUR.IP.ADDRESS.HERE/test_4k.html.
This code is heavily inspired by 3R My Branch Today.

