Create your own Fusion table
Fusion Tables are a Google service for cloud data storage. You need to have a "project" registered with Google to be able to be able to authenticate and access the APIs to upload data.
Go to the Google API Console, click "Create Project" and give it a name. You will now see that project in a list of projects, and clicking on it will bring you to the "Project Dashboard".
This is where things get a bit confusing, because what we are using Fusion tables for here is not the standard use case (e.g. for an Android App or website to gain access).
- Click "APIs & auth"
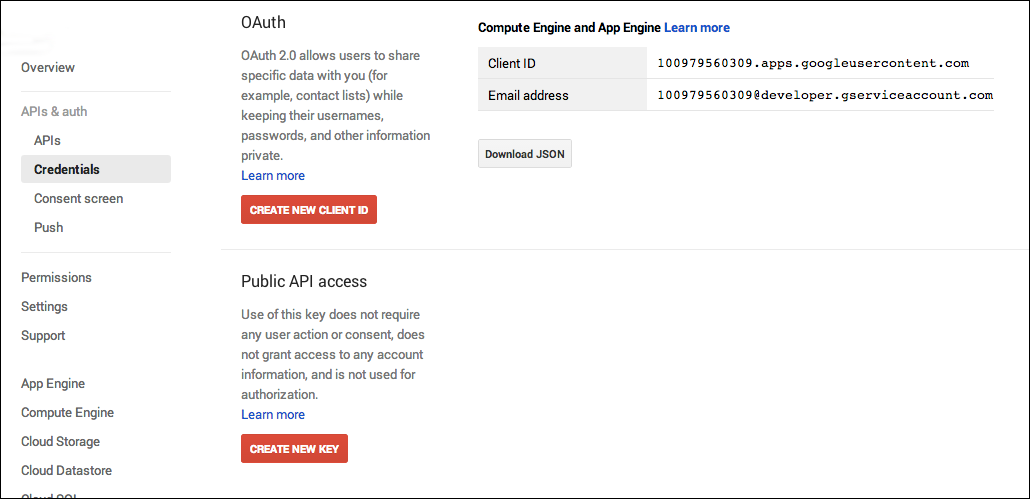
- Click "Credentials", and you will see something like this screenshot:
Next you need to go ahead and:
- Click "Create New Client ID" / select "Installed application"
- Then click "Create New Key" / "Server key"
Now you have a workable project that you can authenticate against and use for Haskell code to make Google API calls. Note that there is not a one-to-one correspondence between projects and tables. These projects are for authentication and quotas/rate-limits. You can have as many projects as you like, touching as many tables as you like.
This part is optional. The hsbencher-fusion package will create the table for you with the specified --name.
If you want to do it yourself:
- Go to https://drive.google.com/.
- Click Create / Fusion Table
Once you access the web interface for your fusion table, you can configure access control (Share), and can filter or reorder the column in the display. Refer to the Fusion Table Help Center for more info.
You're now ready to get benchmarking! The next two steps are to Build the benchmark harness executable and then Run the benchmark executable.