A Rhino3D plugin sponsored by Nano3DTech.
If you like to try it, simply visit the plugin page. Then log in and push the install button in front of latest released version. Or alternatively, do these:
- Use
PackageManagercommand on Rhino3D commandline. - Search for plugin name i.e.
Feather. - The plugin will be listed through the package manager UI.
- Click the install button.

If you like to purchase it, simply do these:
- Visit the online shop here.
- Download the compressed file.
- Extract the compressed file.
- Use Rhino3D
PlugInManagercommand to launch the corresponding UI. - Click on
Install...button. - Select the
RHPfile inside the extracted folder to install it.

Once the plugin is installed, its command can be accessed by typing the plugin name on command line. Start typing Feather on Rhino3D command line to auto complete the plugin command.

The following video demonstrates how to use the plugin command after installation.
It's still work-in-progress. There are known issues like this: #2
3D print is simulated by this plugin. The additive manufacturing simulations can help with anticipating whether 3D designs are printable or not. If the stresses are too high, the 3D print would collapse.
This plugin offers a FeatherPrintable command to simulate the 3D print process. Making sure your 3D print will be done correctly.
This command helps you with the 3D print workflow by FEA, finite element analysis. It means you can analyze your 3D model layer-by-layer almost the way it's 3D printed slice-by-slice.
The 3D print process is usually done by a print floor moving up from a resin tank. The 3D model is solidified layer-by-layer and is created upside-down.

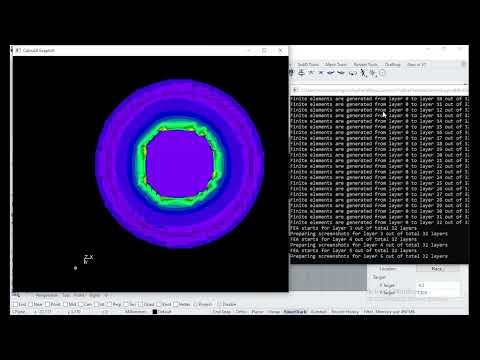
By FeatherPrintable command, at each layer, you will see a graph showing the Von Mises stress throughout the 3D model. You would be able to compare the stress with the ultimate stress of the resin material. This way, you can precisely estimate whether your 3D print process will collapse or not. For example, figure below indicates the analysis for a specific layer.

The comparison of analysis for different layers of a sample 3D model is displayed below. The figure shows the 3D model being printed along the +Z axis. The only force acting upon the 3D model is gravity in +Z direction. It should be noted that 3D print process is usually done by a print floor moving up layer-by-layer while creating the 3D model in an upside-down fasion. The very first layer of 3D model is touching the print floor. So, the first layer is a restrained boundary condition.

The verification is done by Abaqus software. For a single layer, FEAther result is compared with Abaqus one. They are matching. The left side is the FEAther result for a single layer and the right side is the Abaqus one.
