Adding Images and Sounds (FXGL 11)
This tutorial builds on previous Basic Game Example (FXGL 11). Please complete it first if you haven't done so.
Note: if you are making a modular application (e.g. with module-info.java), please read modularity guide
Works with
- Replace player view by an image.
- Add an image to the game UI.
- Play a sound when
Fkey is pressed.
By end of this tutorial you will have:
Using the previous tutorial's project, create the assets directory in:
- If you use Maven/Gradle:
src/main/resources/ - If you use uber-jar (as external library):
src/
Note: you can read more on the standard Directory Structure.
Create textures and sounds directories in assets (ensure there are no typos).
I will use this image and this sound.
To download, click on the link and then click "Download".
You can use your own or download these ones.
Then place the image and the sound you want to use in your game in textures and sounds respectively.
First we will replace the blue rectangle that is the player with an image of your choice. It is very easy to do with the fluent API. In fact, there is only one line of code (commented out below) we will replace from the previous tutorial:
@Override
protected void initGame() {
player = FXGL.entityBuilder()
.at(300, 300)
//.view(new Rectangle(25, 25, Color.BLUE))
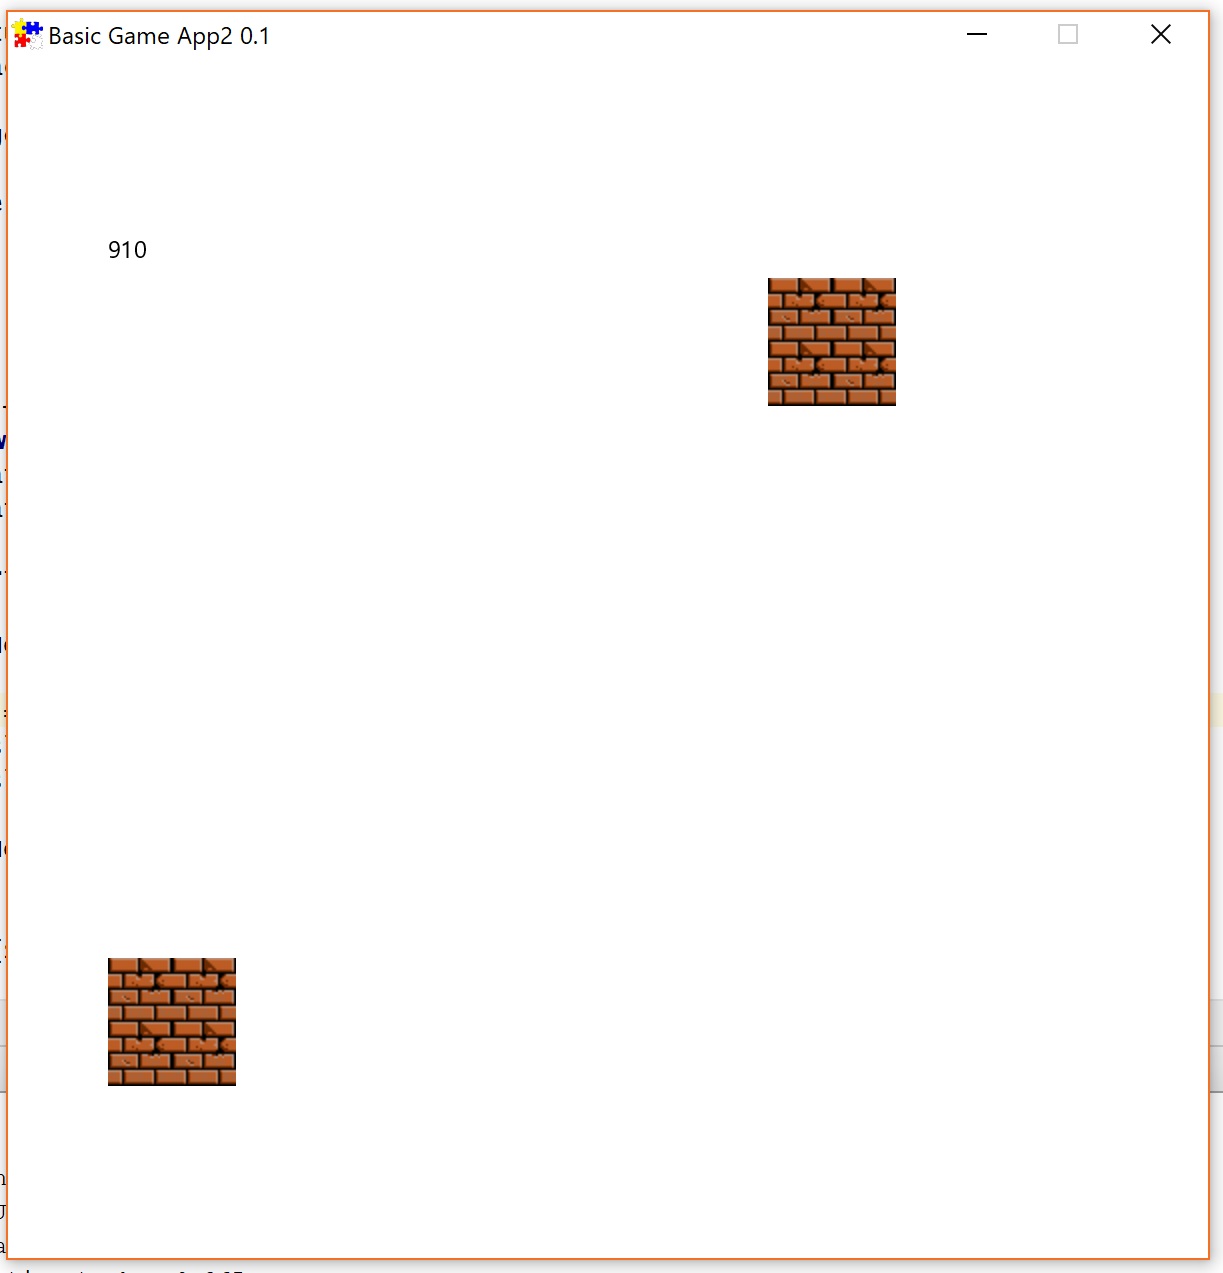
.view("brick.png")
.buildAndAttach();
}The image file that I've used is called brick.png and is located in assets/textures/.
Hence, FXGL knows that it is a texture and so we can simply use just the name.
If your file is named differently, then you will use that name instead.
You should now be able to move the player (who is now represented by a brick image, rather than a blue rectangle). Wasn't too hard, was it? 👍
Remember where we put UI code?
Yes, it's in initUI()!
Let's add the following (note we are using Java 11, so we can use var).
var brickTexture = FXGL.getAssetLoader().loadTexture("brick.png");
brickTexture.setTranslateX(50);
brickTexture.setTranslateY(450);

FXGL.getGameScene().addUINode(brickTexture);
It should be pretty straightforward just by reading the code.
We can load any asset by calling FXGL.getAssetLoader().load ....
We are loading from textures/, so it's loadTexture().
You can find the full list of asset types that FXGL supports in Assets.
Note: a Texture is also a JavaFX Node, so you can easily use it in UI and call UI methods, such as setTranslate().
Almost done 😃
We want to play a sound.
We can do that by calling FXGL.play("drop.wav") - this will call the AssetLoader to load the sound and play it, so it's a convenience method.
To keep things interesting in initInput() we can add:
FXGL.onKeyDown(KeyCode.F, () -> {
    FXGL.play("drop.wav");
});
You should be able to guess what it does.
When F is pressed, the sound will be played.
Note the onKeyDown as opposed to onKey.
The former means to execute the action only once, in the same frame when the key is pressed.
We could, as with Texture, call FXGL.getAssetLoader().loadSound("drop.wav"), apply some settings and then play it.
However, if you just want to play a sound once with default settings, then FXGL.play("drop.wav") is much more concise.
You now know how to add images and sounds to your game. Yay! The full source code is below:
package tutorial;

import com.almasb.fxgl.app.GameApplication;
import com.almasb.fxgl.app.GameSettings;
import com.almasb.fxgl.dsl.FXGL;
import com.almasb.fxgl.entity.Entity;
import javafx.scene.input.KeyCode;
import javafx.scene.paint.Color;
import javafx.scene.shape.Rectangle;
import javafx.scene.text.Text;
import java.util.Map;

import static com.almasb.fxgl.dsl.FXGL.*;

public class BasicGameApp extends GameApplication {
    @Override
    protected void initSettings(GameSettings settings) {
        settings.setWidth(600);
        settings.setHeight(600);
        settings.setTitle("Basic Game App");
        settings.setVersion("0.1");
    }

    @Override
    protected void initInput() {
        onKey(KeyCode.D, () -> {
            player.translateX(5); // move right 5 pixels
            inc("pixelsMoved", +5);
        });

        onKey(KeyCode.A, () -> {
            player.translateX(-5); // move left 5 pixels
            inc("pixelsMoved", -5);
        });

        onKey(KeyCode.W, () -> {
            player.translateY(-5); // move up 5 pixels
            inc("pixelsMoved", +5);
        });

        onKey(KeyCode.S, () -> {
            player.translateY(5); // move down 5 pixels
            inc("pixelsMoved", +5);
        });

        onKeyDown(KeyCode.F, () -> {
            play("drop.wav");
        });
    }

    @Override
    protected void initGameVars(Map<String, Object> vars) {
        vars.put("pixelsMoved", 0);
    }

    private Entity player;

    @Override
    protected void initGame() {
        player = entityBuilder()
                .at(300, 300)
                //.view(new Rectangle(25, 25, Color.BLUE))
                .view("brick.png")
                .buildAndAttach();
    }

    @Override
    protected void initUI() {
        Text textPixels = new Text();
        textPixels.setTranslateX(50); // x = 50
        textPixels.setTranslateY(100); // y = 100

        textPixels.textProperty().bind(getWorldProperties().intProperty("pixelsMoved").asString());

        getGameScene().addUINode(textPixels); // add to the scene graph

        var brickTexture = getAssetLoader().loadTexture("brick.png");
        brickTexture.setTranslateX(50);
        brickTexture.setTranslateY(450);

        getGameScene().addUINode(brickTexture);
    }

    public static void main(String[] args) {
        launch(args);
    }
}
Enjoy!
Want some more? Next tutorial - Adding Collisions (FXGL 11). Feel free to play FXGL games on itch.io When ready, experiment with their source code.