You signed in with another tab or window. Reload to refresh your session.You signed out in another tab or window. Reload to refresh your session.You switched accounts on another tab or window. Reload to refresh your session.Dismiss alert
Enter the cluster name of your choice then click Create to provision the free Kubernetes Cluster.
Please wait for few moments to provision the cluster.
Option B: Create Standard Kubernetes Engine with the following attributes:
Price Plan: Standard
Infrastructure: Classic
Availability: Multi Zone
Metro: Dallas
4 VCPU
16 GB RAM
Worker nodes per zone: 3
Enter the cluster name of your choice then click Create to provision.
Please wait for a few moments to provision the cluster.
Step 2: Deploy IBM Cloud Block Storage plug-in
Just like in step 1, search for "Block Storage" and Click on it.
On the Block Storage page click on Create
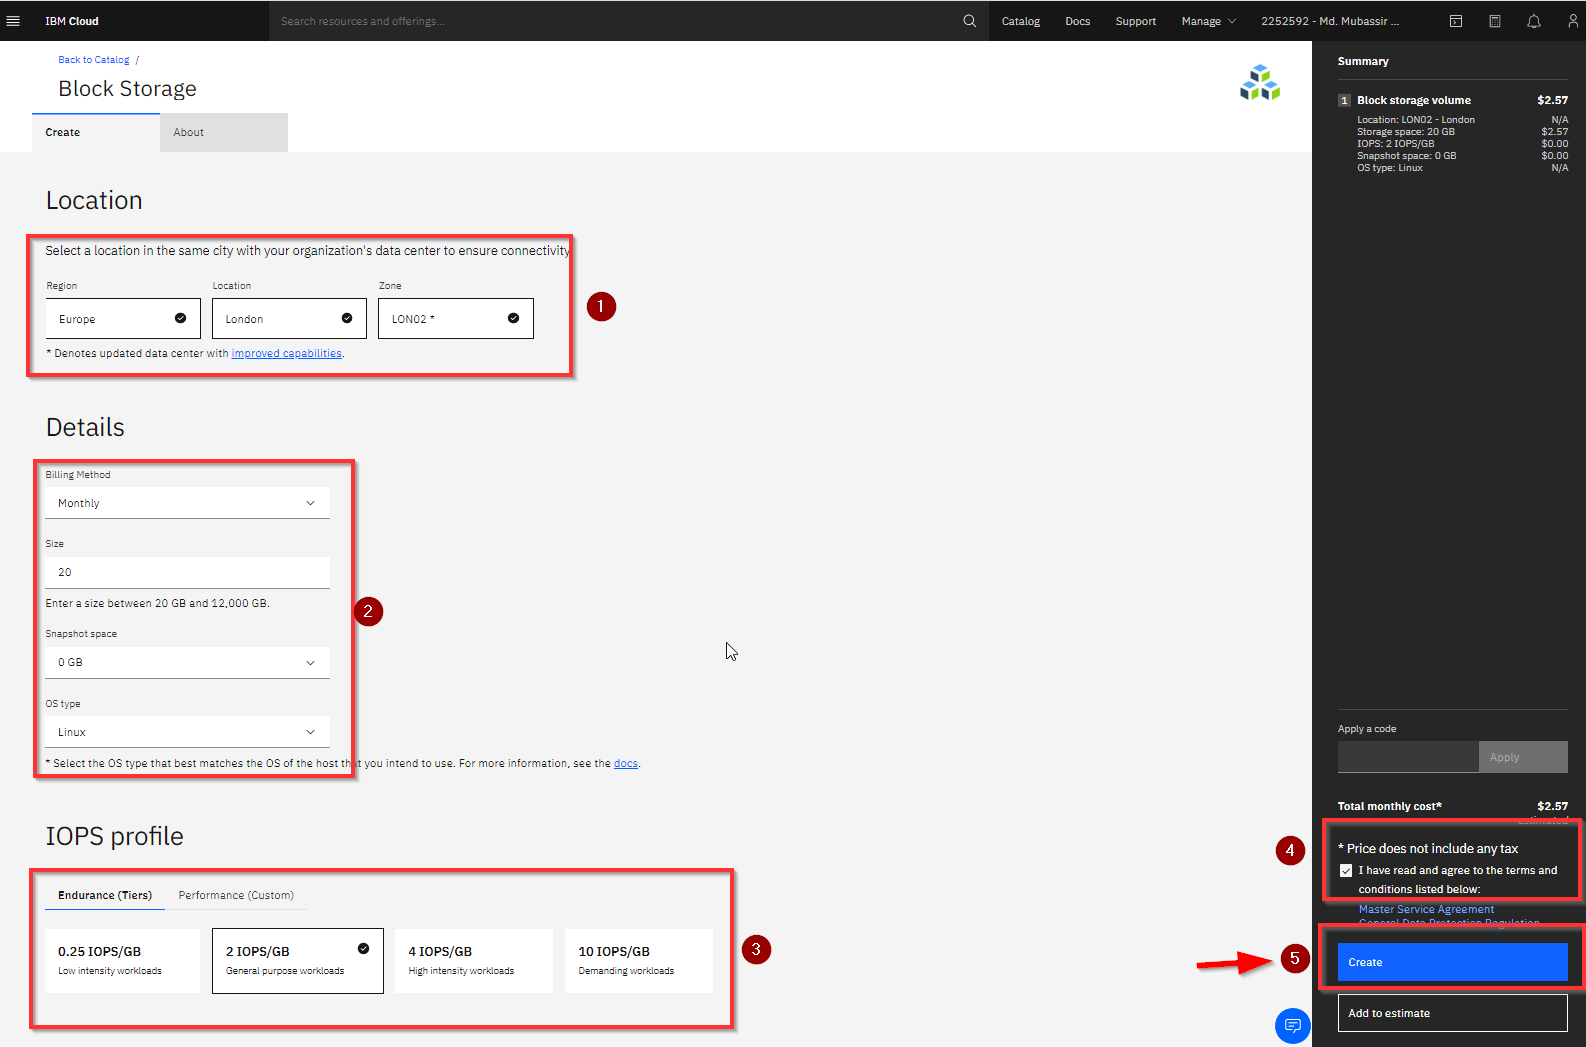
Now input the storage details
N.B. Select location as the cluster location.
Location > Europe > London > LON02
Billing Method > Monthly > 20 GB
OS type > Linux
IOPS > 2 IOPS/GB
Click on “I have agreed to the terms and conditions listed below”.
Now a storage plugin will be available in the dashboard.
Step 3: Deploy Osclass
Again Search for Osclass and Click on it.
You will be taken to the Osclass deployment page.
In the Osclass creation page add the details below:
Target: IBM Kubernetes Service
Method: Helm chart
Kubernetes cluster: mycluster-free
Target namespace: osclass
Workspace: osclass
Resource group: Default
Check on “I have agreed to the terms and conditions listed below”.
Click Install to deploy Osclass.
Please wait for all the process to complete.
Step 4: Verify Installation
Go to Left Navigation Menu.
Click on Kubernetes
Click on your Cluster "mycluster-free".
You will be taken to your clusters overview page where you will see the details of your cluster as well.
To verify the installation find the Actions..
Click on it and select Web terminal from the dropdown menu.
Click install, then wait for a couple of minutes to finish the process.
After completing the installation click on Actions > Web terminal again.
A command line terminal will appear. Type the command below:
Get the list of pods:
kubectl get ns
See if it is running:
kubectl get pod -n osclass -o wide
The Installation is now done! Enjoy !
The text was updated successfully, but these errors were encountered:
This documentation will describe how to Install Osclass on IBM Cloud.
Requirements/Prerequisites
You will need an IBM Cloud Pay-As-You-Go or Subscription Account type which can be found here.
Introduction
This docs will describe how to install Osclass on IBM Cloud. These four steps will be needed as follows:
So let's get started.
Step 1: Provision Kubernetes Cluster
Option A: Create free Kubernetes Engine:
Option B: Create Standard Kubernetes Engine with the following attributes:
Step 2: Deploy IBM Cloud Block Storage plug-in
Location > Europe > London > LON02
Billing Method > Monthly > 20 GB
OS type > Linux
IOPS > 2 IOPS/GB
Click on “I have agreed to the terms and conditions listed below”.
Step 3: Deploy Osclass
In the Osclass creation page add the details below:
Step 4: Verify Installation
Web terminalfrom the dropdown menu.Get the list of pods:
kubectl get nsSee if it is running:
kubectl get pod -n osclass -o wideThe Installation is now done! Enjoy !
The text was updated successfully, but these errors were encountered: