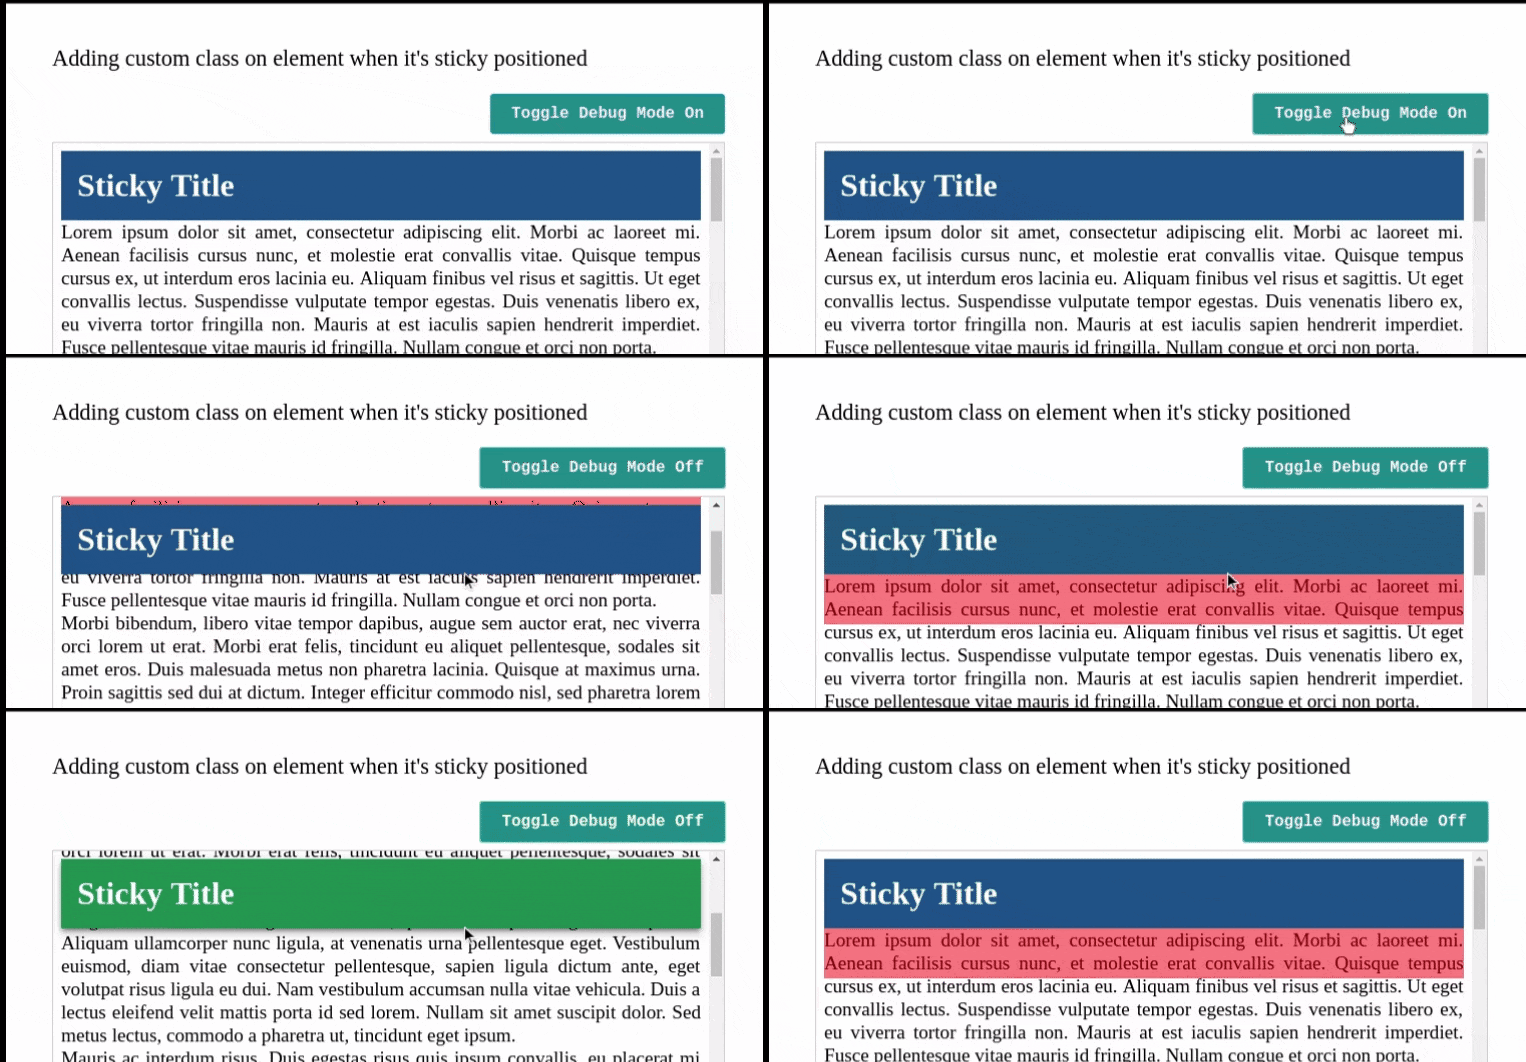
Angular directive that adds sticky position to an HTML element and also applies and remove a custom class when the element is sticky positioned.
<div #scContainer>
  <div
    ngxSticky
    classWhenSticky="my-sticky-class"
    [triggerOn]="'text-content'"
    [scrollContainer]="scContainer"
  >
    Sticky Title
  </div>
  <div id="text-content">
    ...
  </div>
</div>To accomplish the desired behavior you need to take in account the following:
- You need to have a scroll container
- Inside the scroll container you need:
- The sticky element
- An element that when the sticky element bypass it, the directive will trigger the custom class. We call this triggerOn element
- The triggerOn element must be relative positioned (has this css property
position: relative)-
We decided that you control this, because adding
position: relativeto an element can change the visual aspect to something not desired and you will asking why and blaming yourself for something that you are not conscious of, so following the Single Responsibility Principle this directive will not take care of that
-
dummy.component.scss
.scroll-container {
  border: #cccccc 1px solid;
  height: 75vh;
  overflow-y: auto;
  padding: 8px;
}

.title {
  background-color: #1c5089;
  color: #ffffff;
  font-size: 32px;
  font-weight: bold;
  margin: 0;
  padding: 16px;
}

.trigger-on {
  position: relative;
}

.my-sticky-class {
  background-color: #1c8950 !important;
  box-shadow: 0 6px 10px 0 rgba(0, 0, 0, 0.14), 0 1px 18px 0 rgba(0, 0, 0, 0.12),
    0 3px 5px -1px rgba(0, 0, 0, 0.4);
}
dummy.component.html
<div #scContainer>
  <div
    ngxSticky
    class="title"
    [triggerOn]="'trigger-on'"
    classWhenSticky="my-sticky-class"
    [scrollContainer]="scContainer"
  >
    Sticky Title
  </div>
  <div id="trigger-on" class="trigger-on">
    ...Insert a lot of content here
  </div>
</div>If you're using angular version >= 9 and providing the triggerOn value as a string, you need to do it this way [triggerOn]="'text-content'" because Ivy changed something about how we pass parameters. There is an issue open about it
According to Ivy Compatibility guide
Unbound inputs for directives (e.g. name in ) are now set upon creation of the view, before change detection runs (previously, all inputs were set during change detection).
- online demo
- demo-app: Source code available
-
Install
ngx-sticky-directive:# using npm npm install ngx-sticky-directive --save # using yarn yarn add ngx-sticky-directive
-
Import the installed library:
import { StickyDirectiveModule } from 'ngx-sticky-directive';

@NgModule({
  ...
  imports: [
    ...
    StickyDirectiveModule
  ]
})
export class AppModule { }
-
Use it in your component
@Component({
  selector: 'dummy-component',
  styles: [
    `
      .body-container {
        background-color: yellow;
        height: 2000px;
        overflow: scroll;
        padding: 10px;
      }

      .super-height {
        background-color: black;
        height: 5000px;
        position: relative;
        width: 100%;
      }

      #sticky-component {
        background-color: green;
        height: 50px;
        width: 100%;
        top: -10px;
        z-index: 10;
      }

      .when-sticky {
        background-color: magenta !important;
      }
    `,
  ],
  template: `
    <div class="body-container" #scCont>
      <div
        id="sticky-component"
        ngxSticky
        classWhenSticky="when-sticky"
        [triggerOn]="'trigger-on'"
        [scrollContainer]="scCont"
      ></div>
      <div id="trigger-on" class="super-height"></div>
    </div>
  `,
})
class DummyComponent {}
| Name | Description |
|---|---|
| `@Input() scrollContainer: string | ElementRef |
| `@Input() triggerOn: string | ElementRef |
@Input() debugMode: boolean |
Display or hide the sentinel element. |
@Input() classWhenSticky: string |
CSS class to be added to the target element when becomes sticky. |
@Input() zIndex: number = 10 |
CSS zIndex value to set to the target element. By default is 10. |
@Input() top: number = 0 |
CSS top value to set to the sticky element. By default is 0. |
Adding a custom class when an element becomes sticky is the objective of this directive. This is achieved by using Intersection Observer and avoid using scroll events to keep a good performance.
We don't want to use scroll events to detect when an element becomes sticky on the screen for performance reasons. That why we decided to use Intersection Observer.
The Intersection Observer is preferably applied to an element that has a scroll and it detects when a child element enters or exits the screen. So we add an invisible sentinel element to that scroll container and when it exists the screen we know when the sticky element start to be sticky, when the sentinel enters again the sticky element is not longer sticky. In our demo you can toggle the visibility of the sentinel and check how the intersection occurs.
The intention of this directive is to implement the article An event for CSS position:sticky in an Angular way.
The Intersection Observer API is highly supported across the different browsers, however if you have a target audience that is not currently being supported you can use the Intersection Observer Polyfill
If you want to contribute with features, we recommend to read the section that we wrote about Development Tips that is in the Wiki

