You would want to use a setup like this if you are continually switching your Raspberry Pi (RPi) on and off wifi networks. Perhaps you are writing an app like python-wifi-connect or you are doing driver / console work and want to see the boot up messages.
- Buy a serial console cable such as: https://www.adafruit.com/product/954
- Install the drivers for your OS to communicate with the cable (see the links on the above product page).
- Use a seperate power cable for the RPi. If you try to power it off your USB port, it most likely won't work since newer RPi draw too much current.
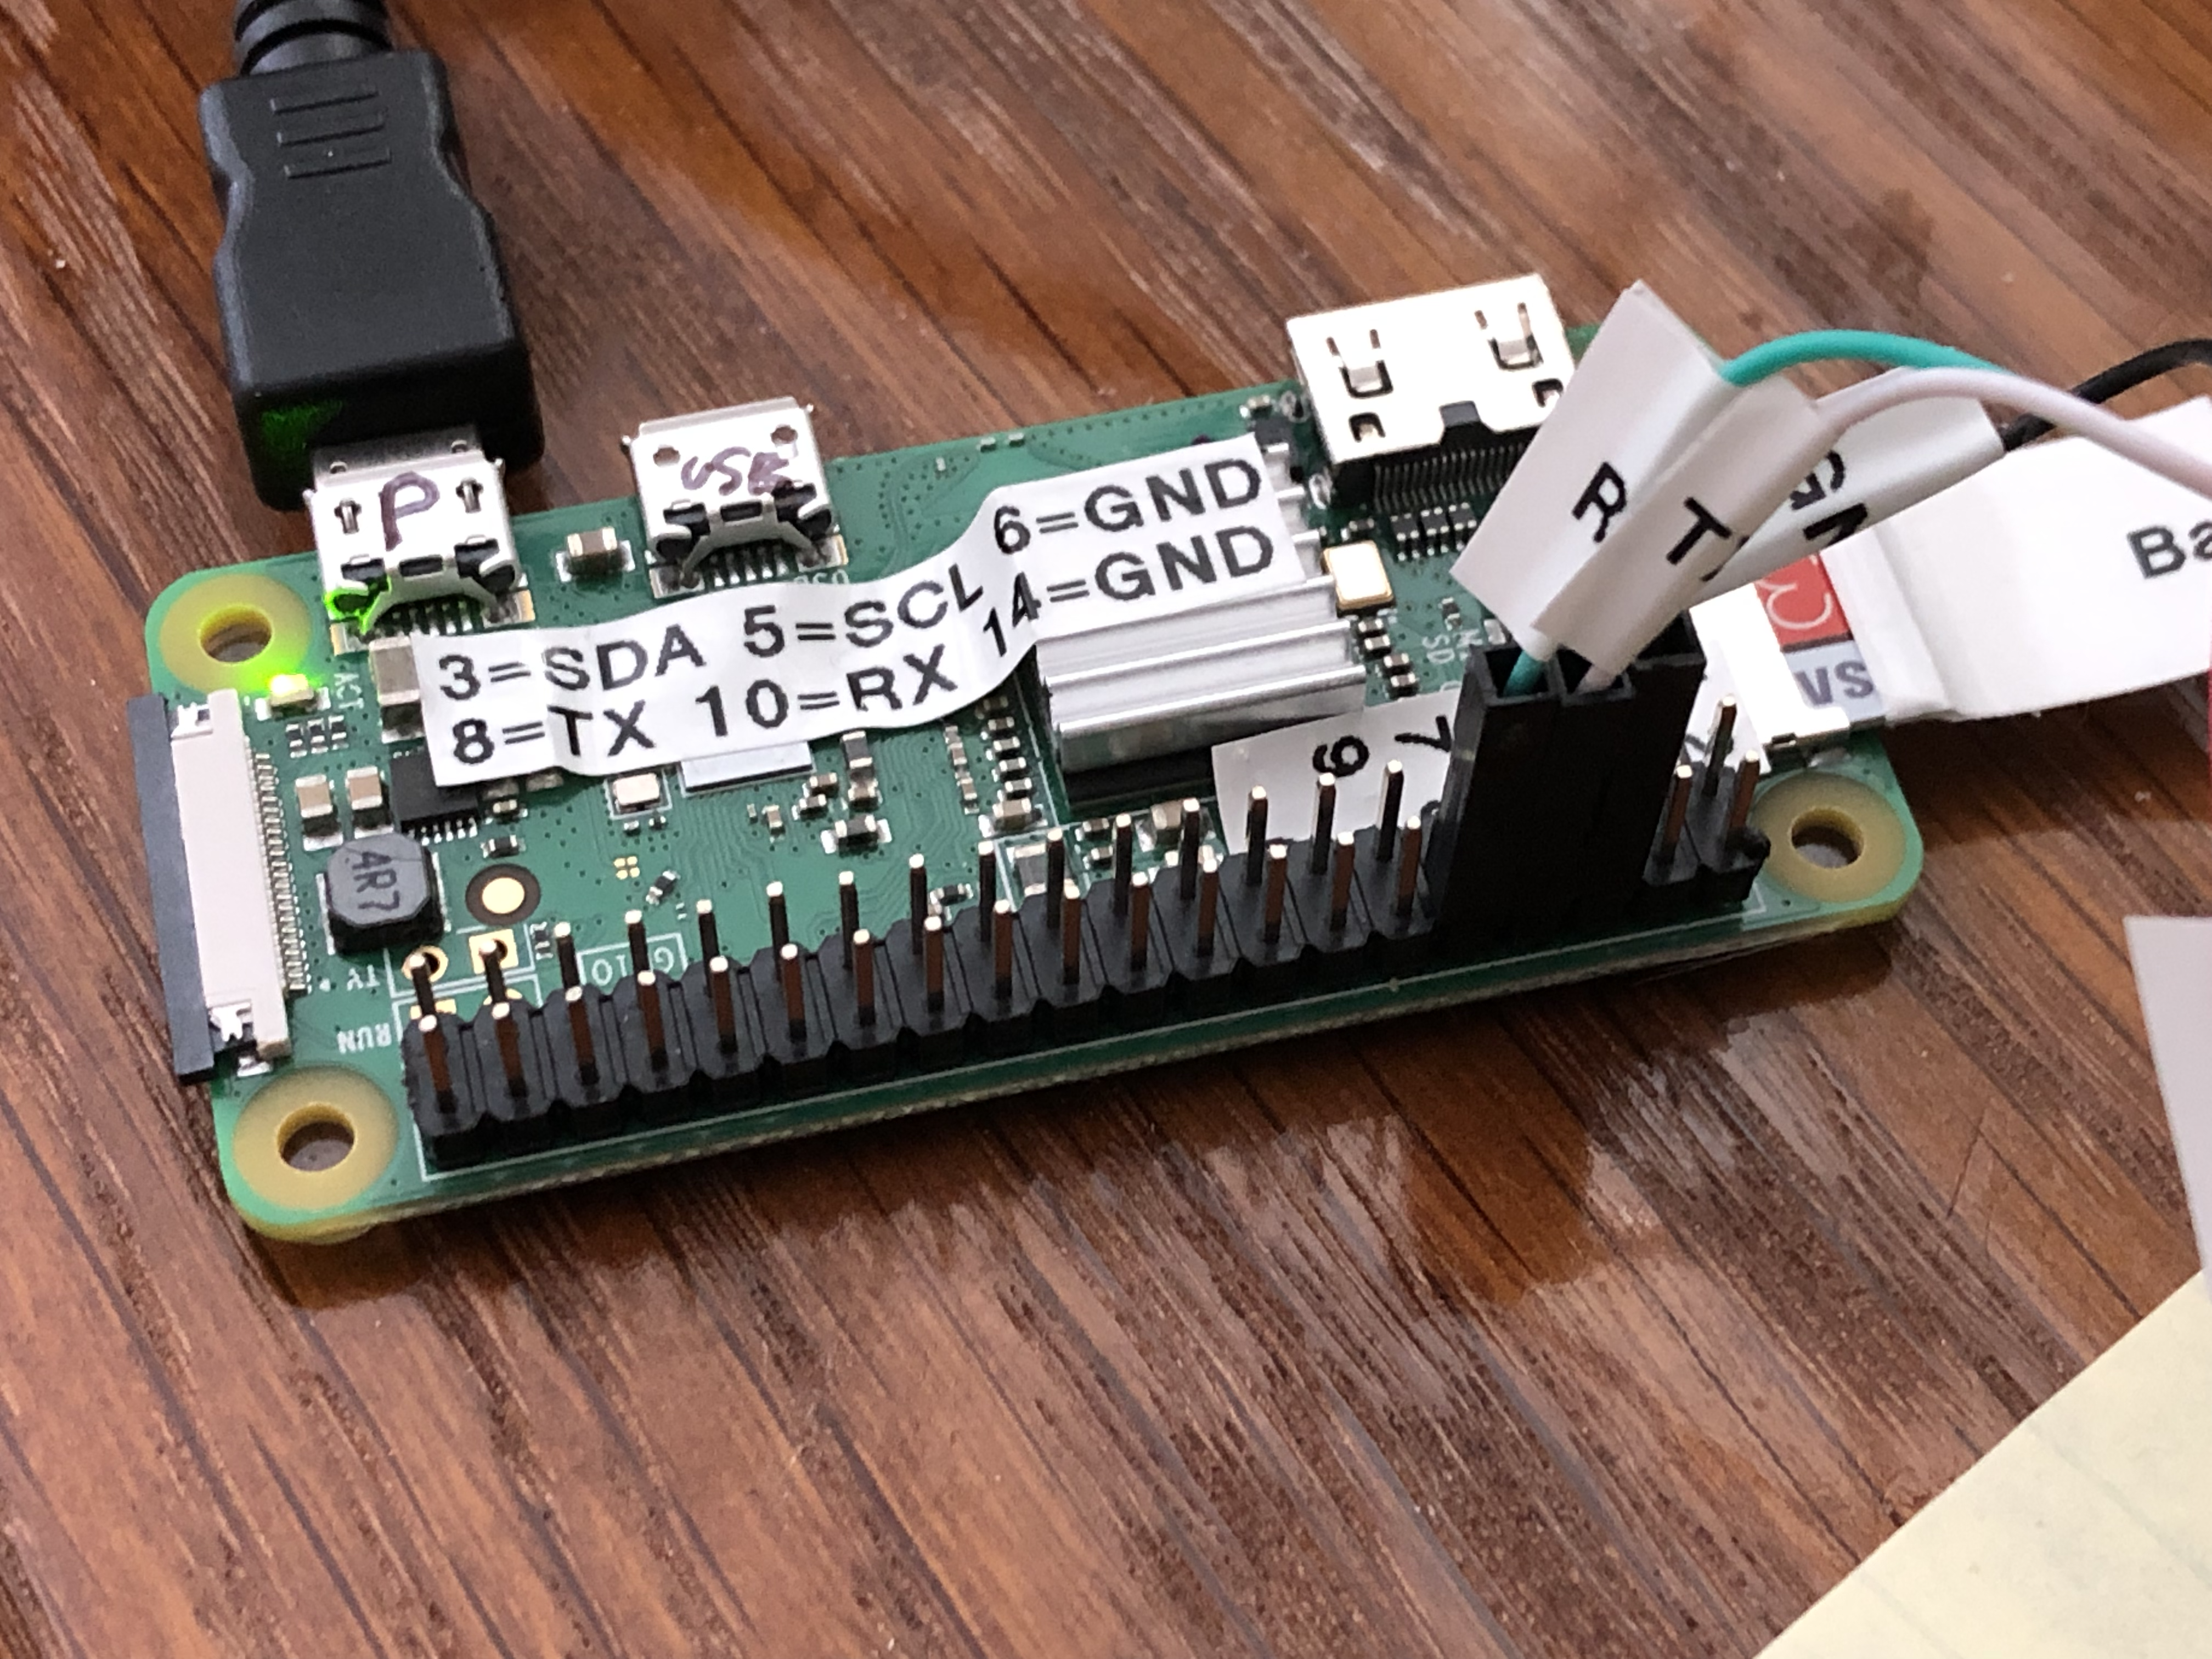
- Attach the cable to the correct RX, TX, GND pins on the RPi you have.
- This image shows the cable connected to a RPi zero with the header soldered on.
- Pi zero pin 6 to cable GND black wire.
- Pi zero pin 8 to TX cable white wire.
- Pi zero pin 10 to RX cable green wire.
- Pi zero pin out.

- Run a terminal program to connect to the cable's serial port on your machine. I develop on OSX, so I use:
screen -S balena -t balena /dev/cu.SLAB_USBtoUART 115200
We use the balena cloud to manage our embedded application as a docker container. So that means to be able to log into the base OS they use, these steps have to be followed:
- Configure a Balena DEVELOPMENT device in their cloud console (not Production, dev lets you login over ssh).
- From the cloud console, download the .zip file and flash the image to an SD card using Balena Etcher.
- Follow the top steps for cable wiring and using
screen. - You may have to press the 'enter/return' key on your keyboard after
screenconnects to see the prompt. - On a balena development OS, you can log in as 'root' with no password.
- Then list what balena (docker) containers are running:
balena ps - Then I can connect to a container to do my app development:
balena container exec -it <container name> /bin/bash